Tuesday, May 17, 2011

Breadbox Makeover

So awhile ago I came across this blog post I fell in love! I had already bought several damask (pattern) items for my new home and knew this would be a PERFECT add. So I went to Goodwill and found one my first trip, yea when does that ever happen?? But here it is :)

Before I got to work ...


Measured the length and width of the wood pieces and marked on the back of
scrapbook paper (I used a scrapbook cutter but you could use scissors to cut it out).


The inside and outside were gross so I gave it an extra good sanding.


Then painted the outside black and applied scrapbook paper with Modge Podge.
(I painted a layer of Modge Podge under the scrapbook paper and over as well, this was the
most tedious part of the whole thing).


I found the knob for the bread box at Michael's for $1, and the bread box was $3 :)
(the glass door knob on top was from a fun trip to canton $7,
and the Cow is my mom's milk dish for coffee)


And its in USE! :)


Can't wait to put it in my FIRST HOME.

Sunday, May 15, 2011

My First Home - A year ago today I graduated College, today I bought a home!!

My blogging has been slacking, and its because I've been spending every extra
second looking at homes, looking at lots, looking online, racking my brains, etc.
And the hunt if FINALLY over, today I signed on my first home.

When I went to sign and date everything I realized I graduated college ONE YEAR ago today!
What a WONDERFUL day :) It takes 3 1/2 months to build so that gives me plenty of time to
craft and look for find fun stuff for my new home!


Sincerely,
Strong Independent Woman!!

If anyone wants to leave me tips on organizing, decorating, who to not get
overwhelmed with the options at the design studio, etc they will be read and greatly appriciated :)

Monday, May 9, 2011

garage sale 4-30-11 finds

I've been slacking on blogging!! I KNOW I KNOW, I'm gunna be better :)


some good finds!! future projects to come :)


Thursday, April 28, 2011

Easter Weekend

Me and Mom had entered the Newpaper peeps diorama contest and we didn't win but it was a TON OF FUN (check it here)

You can see what the Newspaper had to say about us....


Easter Weekend was wonderful!! Of course I decorated eggs...


We did SPARKLE eggs - were super fun!!

But we get SUPER caught up in the Easter bunnies and such and we forget about the real
meaning of Easter and the precious time spent with family.

AND I MUST SAY I LOOOOVE MY FAMILY!!


the shirt were from Tiffany Easter bunny because of the peeps contest we were in seen HERE.


But days like these make me miss the
family members we have lost.  So a good trip
to the Gene Autry Museum brought back some great memories.
(If you don't know who Gene Autry is... Shame on YOU!!!)


thanks for reading *hugs*

Thursday, April 21, 2011

Easter Peanut Butter Cupcakes


I have a slight major addiction to peanut butter. And so I decided to try my hand at peanut butter
cupcakes and peanut butter frosting with an EASTER twist.
recipe
6 tablespoons butter- room temp
1 cup smooth peanut butter
1 1/3 firmly packed brown sugar
3 large eggs
1 tablespoon vanilla extract
2 3/4 cups flour
1 tablespoon baking powder
1 teaspoon salt
1 1/4 cup milk

Preheat oven to 350deg F.
Mix butter, peanut butter, and brown sugar with electric mixer on medium until fluffy (4 min).
Add eggs, beat well, mix in vanilla.
In separate bowl mix flour, baking powder, and salt.
Add dry ingredients to mixer and alternate with Milk, mix well!
Fill cupcakes 3/4 full and bake for 16 min or until tooth pick is inserted and removed clean.
Cool cupcakes.


Cool and now time to FROST


Frosting:
1/2 cup creamy peanut butter
4 1/2 cup confectioners sugar
1 1/2 tsp vanilla extract
10 tbsp milk

cream peanut butter till fluffy (2 min)
beat in confectioners sugar and vanilla
add milk to desired consistency


I add my frosting to a bag to frost its less mess and oh so pretty as seen here.

Now time to decorate and ENJOY.


thanks for FOLLOWING and thanks for reading :)
hugs!

I shared my blog on:


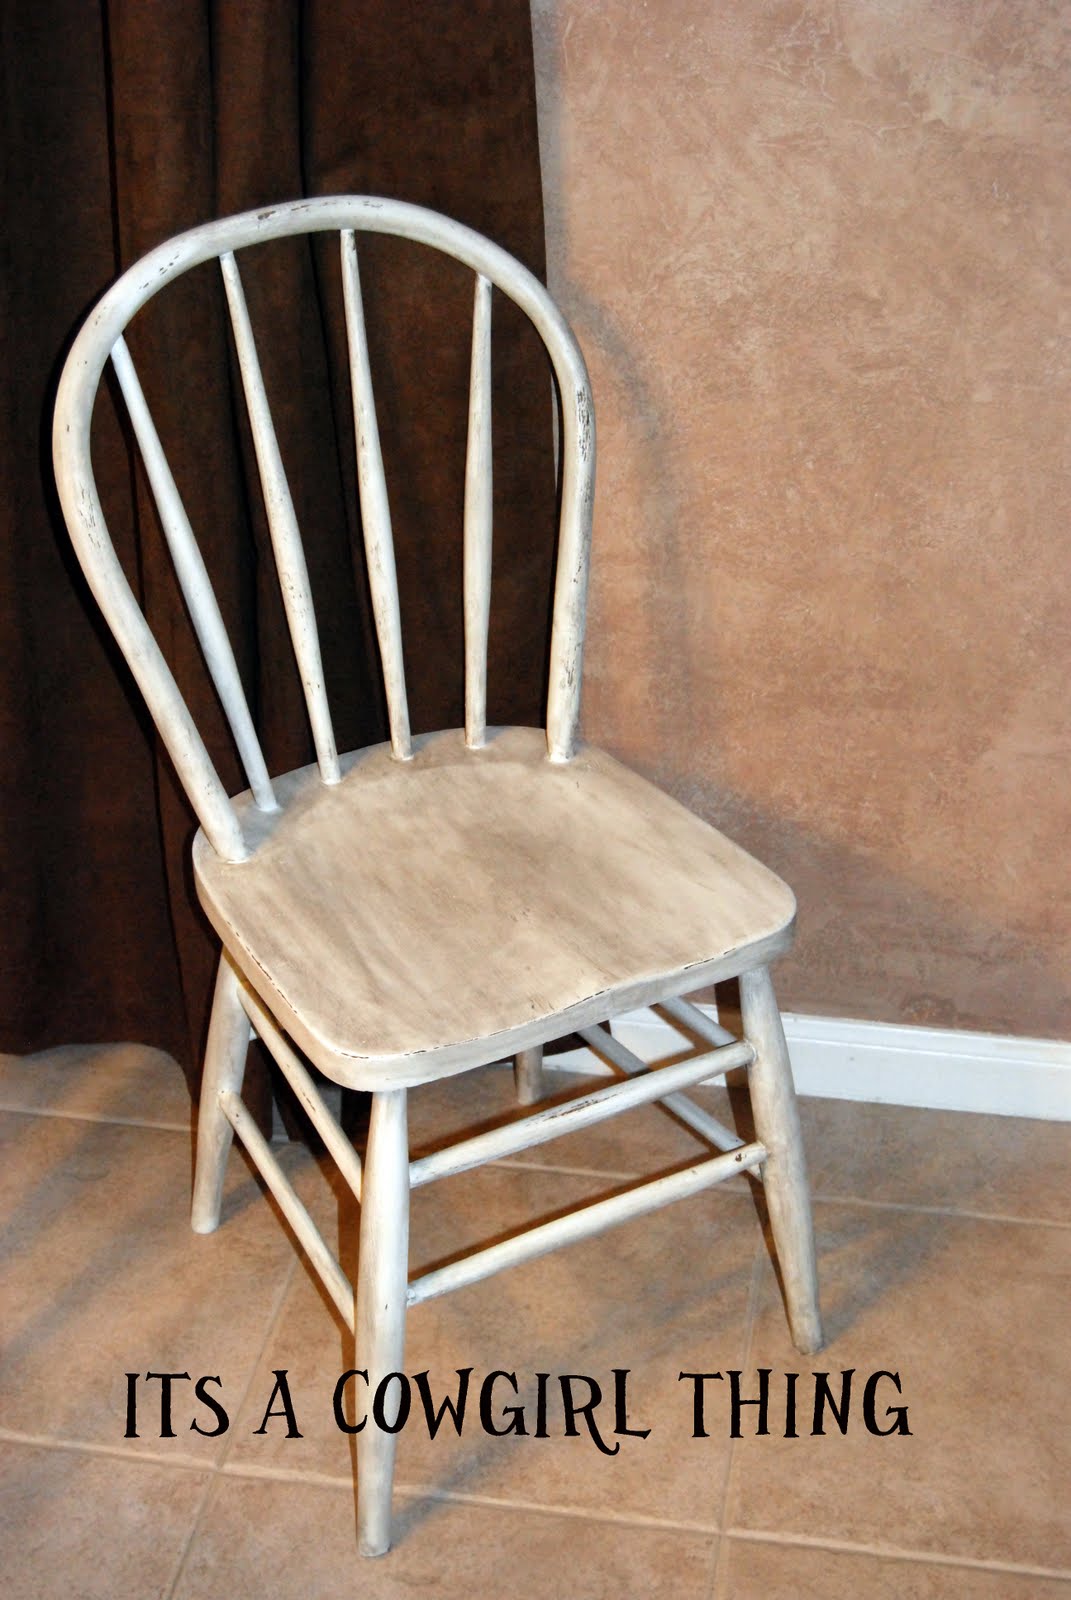
White Garage Sale Chair ReDo

So a few weeks ago I purchased this chair as seen here for $3.
I decided to reuse my oops paint from my magazine rack and got to working.


step 1- sand down chair (I sanded it by hand)
step 2- apply 2 coats of white paint
step 3- apply antiquing glaze (put it on heavy then wipe it off with a wet towel_
step 4- sand down areas for added damage!


Tada! Love it :) so country!!
thanks for reading & to my followers :) !!

Shared this blog on:
houseofhepworths
paisleypassions